cropper
update
London Green Homes
update
  • Home
  • Categories
    • Eco-renovations
    • London Area Home Service Experts
    • Sustainable Tech
    • Green Design
    • Energy Solutions
    • Waste Reduction
    • Community Events
    • Product Reviews
August 20.2025
3 Minutes Read

Why RTA Cabinets Are the Top Choice for Contractors in 2025

RTA cabinets for contractors in a stylish modern kitchen.

Why RTA Cabinets Are Essential for 2025 Contractors

As the construction and renovation market steadily evolves toward more efficient solutions, Ready to Assemble (RTA) Cabinets are emerging as a preferred choice for contractors. In 2025, contractors face increased demands for efficiency and affordability, and RTA cabinets offer unique advantages that cater to these needs.

Understanding the RTA Advantage

Unlike traditional cabinetry, RTA Cabinets come in flat packs. This ease of transport not only minimizes freight costs but also alleviates the storage constraints many contractors encounter. When deliveries arrive flat rather than assembled, the logistics become much more manageable, allowing contractors to streamline operations amidst busy job sites.

Time Efficiency: The Craftsman's Ally

Contractors know all too well that time is a precious commodity. Delays in cabinet delivery can significantly hinder progress on a job site, leading to costly overruns. RTA Cabinets arrive on schedule, allowing contractors to significantly reduce the overall installation time. A project that once took several days can now be completed in mere hours, thanks to the pre-cut and labeled components. For contractors juggling multiple projects, this time-saving aspect can mean the difference between finishing ahead of schedule or facing penalties for delays.

Cost Effectiveness: Satisfying Clients and Contractors Alike

With tight budgets, both clients and contractors are on the lookout for cost-effective solutions. RTA cabinets typically come at a lower price point due to their shipping and assembly processes that cut overhead costs. Instead of factory workmanship, RTA Cabinets shift the assembly responsibility onto the contractors and their teams, translating into significant savings. High-quality materials, such as hardwood and plywood, are often utilized, ensuring that clients receive durable products without compromising on quality.

Diverse Options for Unique Client Needs

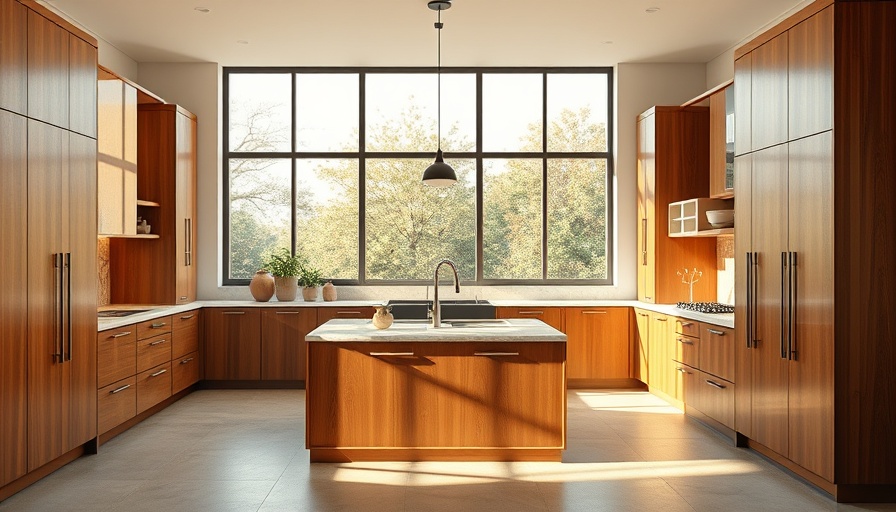
The flexibility of RTA Cabinets is another standout feature. Whether clients desire contemporary or classic designs, contractors can offer a plethora of options—from vibrant white shaker cabinets to rich wood tones. This variety makes it simpler for contractors to cater to diverse tastes and preferences, thus enhancing client satisfaction and project appeal.

Environmental Impact: Embracing Sustainability

As sustainability becomes an increasingly pressing concern within the construction industry, RTA Cabinets can align with environmentally responsible building practices. Many manufacturers produce cabinets using sustainable materials that comply with green building standards. By choosing RTA options, contractors can also contribute to waste reduction since these cabinets minimize off-cuts and excess materials typically associated with custom cabinetry. Emphasizing sustainable building practices not only differentiates contractors in a competitive market but also appeals to eco-conscious clients.

Future Trends: What’s Next for RTA Cabinets?

Looking toward the future, the RTA cabinet market is set to flourish as more people opt for kitchen upgrades. As installation technologies continue to evolve, we may see advancements in assembly techniques, further simplifying the process. Innovations in eco-friendly materials and production methods will likely take center stage, attracting more contractors committed to sustainability.

In Conclusion: Why Make the Shift to RTA Cabinets?

For contractors navigating the fast-paced world of renovations and new builds, RTA Cabinets offer myriad benefits that translate to savings in time, money, and resources. By adopting these efficient solutions, contractors can deliver high-quality, stylish finishes that meet various client needs, all while maintaining a commitment to sustainability. As we look toward 2025, embracing RTA Cabinets may very well be the strategic move that keeps contractors competitive in a dynamic marketplace.

Don't wait for delays or costly custom orders; consider incorporating RTA cabinets into your repertoire. They might just be the key to a faster, smoother workflow and satisfied clients in the year ahead.

Eco-renovations

7 Views

0 Comments

Write A Comment

*
*
Please complete the captcha to submit your comment.
Related Posts All Posts
05.17.2026

Embrace the Future: Discover Why Vacuum Glazing is the Key to Energy Efficiency

Update Unraveling the Future of Energy Efficiency with VIG In an era where energy efficiency is paramount, vacuum insulated glazing (VIG) emerges as a groundbreaking advancement that significantly outperforms traditional triple-pane windows. With the capability of achieving exceptional thermal resistance within a sleek, single-pane profile, VIG is transforming how we think about window technology. Its design, akin to that of a thermos, minimizes energy loss by creating a vacuum that eliminates convection and conduction, resulting in superior insulation. How Vacuum Insulated Glass Works Vacuum insulated glass utilizes the principle of insulating properties found in a vacuum. Air is removed between two sheets of glass, which prevents heat transfer, similar to the insulated walls of a travel mug. This creates an energy-efficient barrier that keeps homes warmer in the winter and cooler in the summer. Using micro-pillars, the glass maintains its structural integrity despite the tremendous atmospheric pressure acting on it, allowing for high performance without increased thickness. Comparing Thermal Performance: VIG vs. Triple Pane The standard for thermal efficiency in windows has long been the triple-pane design, which offers multiple layers of glass filled with argon or krypton gases. However, VIG boasts a remarkable U-value (thermal transmittance) that can reach as low as 0.4 W/(m²·K), markedly more efficient than even the most advanced triple-pane systems, which typically settle around 1.0 to 1.9 W/(m²·K). This efficiency can lead to substantial energy savings, especially for homes in areas like London where heating costs can be significant. Durability and Longevity: A Smart Choice A critical consideration in any window investment is durability. Tests conducted on vacuum insulated glass units demonstrate their stability even under severe temperature fluctuations and mechanical loads. In practice, this means homeowners can expect a long lifespan from their VIG installations without the risk of failure or significant loss of insulation performance over time. The Role of VIG in Retrofits and Historic Restoration For homeowners looking to enhance energy efficiency in older buildings or historic homes, VIG presents a unique solution. Its slim profile enables it to fit within existing frames without needing structural modifications, making it an ideal choice for retrofitting without compromising the aesthetic of historic architecture. As society increasingly advocates for sustainability, leveraging such technologies can aid in preserving the environment while maintaining the integrity of our built heritage. Challenges and Considerations for VIG Technology Despite its many advantages, VIG is not without challenges. For mass adoption in retrofit projects, there are concerns about the long-term durability of the vacuum seal, particularly under extreme climatic conditions. Ongoing research is dedicated to improving the longevity and stability of VIG, focusing on how it interacts with environmental factors over time. In the UK, where energy consumption for heating is significant, adopting VIG could drastically reduce energy bills and improve home comfort. VIG’s lightweight structure also allows for increased window designs, enabling better daylighting while lowering heating demands. Making the Switch: What Homeowners Need to Know London homeowners considering upgrades to their windows should be informed about the myriad benefits of vacuum insulated glazing. The reduction in heating costs, enhanced comfort, and environmental sustainability are compelling reasons to invest in this technology. Now is the prime time to evaluate options for incorporating VIG in your home renovation plans. As we embrace a future focused on sustainability, homeowners, builders, and architects alike should champion innovations like VIG that promise efficiency and performance. For those deeply invested in creating energy-efficient homes, exploring VIG options through reputable suppliers can give immediate clarity on the steps to integrate this cutting-edge glazing solution.

05.15.2026

Is Installing RTA Cabinets Hard? A DIY Guide for Homeowners

Update The RTA Cabinet Revolution: Why DIY is More Than Just a Trend Ready-to-Assemble (RTA) cabinets have revolutionized the way homeowners approach kitchen renovations. In an era where evolving technologies and environmental awareness shape consumer choices, RTA cabinets exemplify sustainable practices by reducing shipping costs and emissions while enabling customization at a fraction of the price of traditional cabinetry. But is it really hard to install these cabinets yourself? Let’s explore the value of DIYing your RTA kitchen cabinets. Understanding RTA Cabinets: A Smart Choice RTA cabinets are designed for homeowners eager for a cost-effective and customizable solution. The reduced labor costs of assembly translate into lower prices, allowing for choices that fit various styles and budgets. According to Lily Ann Cabinets, their kits often include high-quality materials, making them durable and attractive options for modern homes. Assembling cabinets yourself not only engages your creativity but also provides insight into sustainable materials, a focal point for eco-conscious homeowners. Decoding the Installation Process: Steps to Success Installing RTA cabinets is a systematic process that can be tackled with patience and the right tools. Begin by gathering essential tools such as a power drill, level, and measuring tape. Each step—from unboxing and layout to securing the cabinets—requires careful execution. 1. **Measure Your Space**: Proper measurements guide your layout. Consider not just height and width, but also any interruptions like electrical outlets. 2. **Assembly**: Use the manufacturer's instructions for assembly. Most require minimal tools thanks to a cam-lock system. 3. **Installation**: After assembly, install starting with upper cabinets for easy alignment rather than risking damage to new floors. 4. **Final Touches**: Attach doors and make adjustments to ensure everything is level and operating smoothly. Common Pitfalls and Missteps Even the most seasoned DIY enthusiasts can overlook crucial details during installation. Common mistakes include failing to read the instruction sheet carefully and not ensuring the cabinets are fully secured to wall studs. Checking the orientation of panels before assembly can save considerable time and hassle later on. Embracing Flexibility: Customizing Your RTA Cabinets One of the primary benefits of choosing RTA cabinets lies in their flexibility. Many manufacturers provide various door styles, finishes, and configurations. While the cabinets come with standard dimensions, customization options allow homeowners to tailor designs to their unique space, contributing to a sustainable ethos through thoughtful design choices. Conclusion: Taking the Leap into DIY Installing RTA cabinets, while seemingly daunting, can lead to a rewarding experience for homeowners willing to embrace the challenge. This DIY approach not only fosters a sense of accomplishment but also supports sustainable building practices by ensuring a thoughtful connection between design and functionality. By educating oneself about this process, homeowners elevate their skillsets while enhancing the beauty of their living spaces. If you're ready to transform your kitchen while prioritizing sustainability, the time to start is now!

05.12.2026

Discover How to Install a Drip Irrigation System Efficiently

Update Unlocking the Secrets of Drip Irrigation: A Game-Changer for Your GardenFor any gardening enthusiast, efficient irrigation can transform your gardening experience. If you’ve been contemplating whether to invest in a drip irrigation system, now is the time! This innovative solution not only saves water but also ensures your plants receive just the right amount they need. With a price tag around $75 and a set-up time of just a few hours, it’s an accessible project that can yield remarkable results.Why Choose Drip Irrigation?Drip irrigation is described as a clever and simple solution for watering your plants directly at the root zone, minimizing evaporation and runoff—a huge advantage over traditional sprinklers. Studies suggest that drip systems can use up to 50% less water, which is a win-win for both the environment and your wallet.Step-by-Step Installation ProcessInstalling a drip irrigation system is akin to assembling a puzzle: you simply connect the dots with hoses and emitters to create an efficient watering network. Here’s a quick overview of the key steps:Planning and Designing: Identify the garden layout and group plants by their watering needs. You might want to create a checklist just like the one suggested by the experts at Sprinkler School.Gather the Materials: Purchase a good quality drip irrigation kit. Check out stores like Home Depot or Sprinkler Warehouse for a variety of options.Connect to the Water Source: Use a backflow preventer and timer. This way, you will ensure that your water supply stays untainted while enjoying automated watering.Distribute the Water: Lay out and secure your tubing, ensuring that everything is connected properly to provide equal access to water for all your plants.Potential Challenges and SolutionsLike any DIY project, installing a drip irrigation system can come with its challenges. From ensuring the proper pressure to avoiding clogs in emitters, it's important to troubleshoot issues as they arise. Regularly flushing the system every four to six months is a recommended practice by gardening experts to prevent clogging and ensure optimal performance.Conclusion: Start Your Eco-Friendly Journey TodayInstalling a drip irrigation system is more than just a home improvement task; it's a commitment to sustainability and efficiency in gardening. As you reflect on reshaping your watering strategy, take the plunge and install a drip system. Your plants (and the planet) will thank you for it!Ready to make your garden thrive with sustainable watering? Get your drip irrigation supplies today and start creating a water-efficient garden!

Terms of Service

Privacy Policy

Core Modal Title

Sorry, no results found

You Might Find These Articles Interesting

T
Please Check Your Email
We Will Be Following Up Shortly
*
*
*