cropper
update
London Green Homes
update
  • Home
  • Categories
    • Eco-renovations
    • London Area Home Service Experts
    • Sustainable Tech
    • Green Design
    • Energy Solutions
    • Waste Reduction
    • Community Events
    • Product Reviews
October 17.2025
3 Minutes Read

Protect Your Home's Efficiency: Understanding R-Values and Thermal Drift

Stacked foam insulation panels showing signs of aging, highlighting thermal drift in foam insulation.

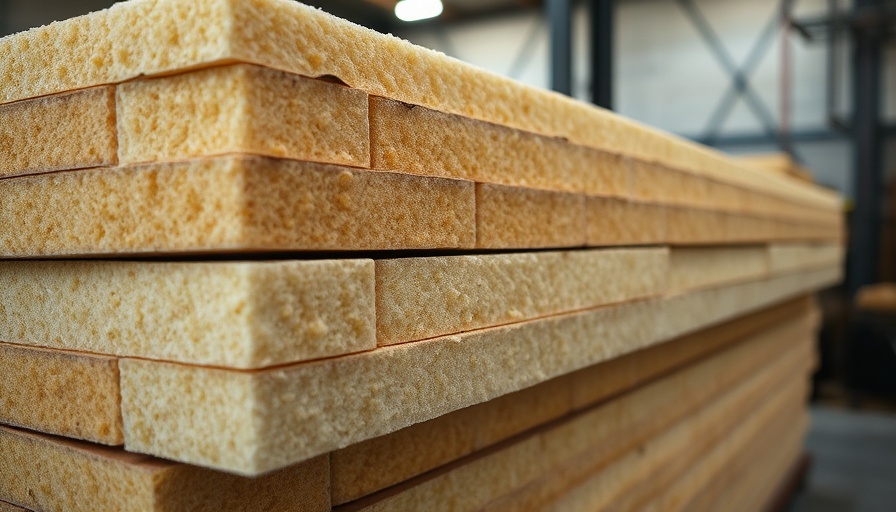
Understanding Thermal Drift in Foam Insulation

For homeowners in London seeking energy efficiency, regulating their building’s thermal performance is key, particularly when choosing insulation materials. Foam insulation, while initially attractive for its high R-values, may undergo thermal drift—this is where the initial insulating value steadily diminishes over time as the gas used in the foam dissipates and air infiltrates its cells.

According to research, polyisocyanurate (polyiso) insulation is particularly vulnerable to this phenomenon, with R-values potentially dropping up to 50% in colder climates, impacting its performance and effectiveness. Extruded polystyrene (XPS), while slightly more stable, also experiences a gradual loss of R-value, albeit at a slower rate.

Understanding how and why thermal drift occurs helps homeowners and building professionals alike avoid under-insulating their spaces, ultimately safeguarding long-term energy performance. Following the evolution of R-values from their original specifications to the Long-Term Thermal Resistance (LTTR) is essential in selecting the right insulation for various applications.

The Implications of R-Value Degradation

The degradation in R-value is not merely a minor inconvenience; rather, it can lead to increased energy costs and compromised comfort levels in homes. Homeowners should be aware that the initial performance metrics provided by manufacturers can often overstate insulation effectiveness, sometimes by 10-25% as highlighted in various studies.

In situations where insulation materials are poorly matched to climate conditions—such as using polyiso in frigid areas—transitioning to alternatives like expanded polystyrene (EPS), which maintains a more stable R-value over time, is beneficial. EPS does not rely on trapping gases for its thermal performance and thus mitigates many risks related to thermal drift.

Moisture and Temperature: Hidden Influencers on Insulation Performance

Moisture absorption is another critical factor to consider when evaluating insulation options. In particular, EPS is known to be prone to moisture penetration, leading to reduced performance. Conversely, XPS exhibits excellent moisture resistance, making it preferable for applications such as foundations and basements where reduced insulation effectiveness could lead to significant issues.

Furthermore, the influence of temperature cannot be overlooked. Polyiso insulation works best in moderate temperatures, and performance tends to plummet in persistent cold, where alternatives like XPS or EPS may prove advantageous. Home builders should guarantee that the insulation systems deployed in their homes are tailored to the respective climates to maximize energy savings and insulation longevity.

Protecting Insulation: The Role of UV Exposure

An additional layer of consideration is the exposure of insulation to UV rays. All three types—XPS, EPS, and polyiso—are at risk of degradation from direct sunlight, leading to potential brittleness over time. To combat this, it is crucial for installations to be covered promptly after placement, protecting the foam from exposure and helping maintain its insulating qualities.

Future Trends in Foam Insulation

As we look toward the future, the introduction of new blowing agents, like HFOs that are less harmful to the environment than traditional options, could redefine insulation materials in the coming years. Their potential to retain R-values more effectively and reduce environmental concerns presents exciting opportunities for sustainable building efforts.

Overall, by remaining informed about the impacts of thermal drift, moisture absorption, temperature fluctuations, and UV exposure, homeowners can make smarter investments in insulation that not only conserve energy but also secure their home’s comfort and efficiency.

Engaging in eco-renovation efforts can offer substantial long-term benefits. Those in the London area are encouraged to consider the implications of their insulation choices and possibly consult with local eco-friendly home service experts for tailored solutions.

Eco-renovations

16 Views

0 Comments

Write A Comment

*
*
Please complete the captcha to submit your comment.
Related Posts All Posts
05.17.2026

Embrace the Future: Discover Why Vacuum Glazing is the Key to Energy Efficiency

Update Unraveling the Future of Energy Efficiency with VIG In an era where energy efficiency is paramount, vacuum insulated glazing (VIG) emerges as a groundbreaking advancement that significantly outperforms traditional triple-pane windows. With the capability of achieving exceptional thermal resistance within a sleek, single-pane profile, VIG is transforming how we think about window technology. Its design, akin to that of a thermos, minimizes energy loss by creating a vacuum that eliminates convection and conduction, resulting in superior insulation. How Vacuum Insulated Glass Works Vacuum insulated glass utilizes the principle of insulating properties found in a vacuum. Air is removed between two sheets of glass, which prevents heat transfer, similar to the insulated walls of a travel mug. This creates an energy-efficient barrier that keeps homes warmer in the winter and cooler in the summer. Using micro-pillars, the glass maintains its structural integrity despite the tremendous atmospheric pressure acting on it, allowing for high performance without increased thickness. Comparing Thermal Performance: VIG vs. Triple Pane The standard for thermal efficiency in windows has long been the triple-pane design, which offers multiple layers of glass filled with argon or krypton gases. However, VIG boasts a remarkable U-value (thermal transmittance) that can reach as low as 0.4 W/(m²·K), markedly more efficient than even the most advanced triple-pane systems, which typically settle around 1.0 to 1.9 W/(m²·K). This efficiency can lead to substantial energy savings, especially for homes in areas like London where heating costs can be significant. Durability and Longevity: A Smart Choice A critical consideration in any window investment is durability. Tests conducted on vacuum insulated glass units demonstrate their stability even under severe temperature fluctuations and mechanical loads. In practice, this means homeowners can expect a long lifespan from their VIG installations without the risk of failure or significant loss of insulation performance over time. The Role of VIG in Retrofits and Historic Restoration For homeowners looking to enhance energy efficiency in older buildings or historic homes, VIG presents a unique solution. Its slim profile enables it to fit within existing frames without needing structural modifications, making it an ideal choice for retrofitting without compromising the aesthetic of historic architecture. As society increasingly advocates for sustainability, leveraging such technologies can aid in preserving the environment while maintaining the integrity of our built heritage. Challenges and Considerations for VIG Technology Despite its many advantages, VIG is not without challenges. For mass adoption in retrofit projects, there are concerns about the long-term durability of the vacuum seal, particularly under extreme climatic conditions. Ongoing research is dedicated to improving the longevity and stability of VIG, focusing on how it interacts with environmental factors over time. In the UK, where energy consumption for heating is significant, adopting VIG could drastically reduce energy bills and improve home comfort. VIG’s lightweight structure also allows for increased window designs, enabling better daylighting while lowering heating demands. Making the Switch: What Homeowners Need to Know London homeowners considering upgrades to their windows should be informed about the myriad benefits of vacuum insulated glazing. The reduction in heating costs, enhanced comfort, and environmental sustainability are compelling reasons to invest in this technology. Now is the prime time to evaluate options for incorporating VIG in your home renovation plans. As we embrace a future focused on sustainability, homeowners, builders, and architects alike should champion innovations like VIG that promise efficiency and performance. For those deeply invested in creating energy-efficient homes, exploring VIG options through reputable suppliers can give immediate clarity on the steps to integrate this cutting-edge glazing solution.

05.15.2026

Is Installing RTA Cabinets Hard? A DIY Guide for Homeowners

Update The RTA Cabinet Revolution: Why DIY is More Than Just a Trend Ready-to-Assemble (RTA) cabinets have revolutionized the way homeowners approach kitchen renovations. In an era where evolving technologies and environmental awareness shape consumer choices, RTA cabinets exemplify sustainable practices by reducing shipping costs and emissions while enabling customization at a fraction of the price of traditional cabinetry. But is it really hard to install these cabinets yourself? Let’s explore the value of DIYing your RTA kitchen cabinets. Understanding RTA Cabinets: A Smart Choice RTA cabinets are designed for homeowners eager for a cost-effective and customizable solution. The reduced labor costs of assembly translate into lower prices, allowing for choices that fit various styles and budgets. According to Lily Ann Cabinets, their kits often include high-quality materials, making them durable and attractive options for modern homes. Assembling cabinets yourself not only engages your creativity but also provides insight into sustainable materials, a focal point for eco-conscious homeowners. Decoding the Installation Process: Steps to Success Installing RTA cabinets is a systematic process that can be tackled with patience and the right tools. Begin by gathering essential tools such as a power drill, level, and measuring tape. Each step—from unboxing and layout to securing the cabinets—requires careful execution. 1. **Measure Your Space**: Proper measurements guide your layout. Consider not just height and width, but also any interruptions like electrical outlets. 2. **Assembly**: Use the manufacturer's instructions for assembly. Most require minimal tools thanks to a cam-lock system. 3. **Installation**: After assembly, install starting with upper cabinets for easy alignment rather than risking damage to new floors. 4. **Final Touches**: Attach doors and make adjustments to ensure everything is level and operating smoothly. Common Pitfalls and Missteps Even the most seasoned DIY enthusiasts can overlook crucial details during installation. Common mistakes include failing to read the instruction sheet carefully and not ensuring the cabinets are fully secured to wall studs. Checking the orientation of panels before assembly can save considerable time and hassle later on. Embracing Flexibility: Customizing Your RTA Cabinets One of the primary benefits of choosing RTA cabinets lies in their flexibility. Many manufacturers provide various door styles, finishes, and configurations. While the cabinets come with standard dimensions, customization options allow homeowners to tailor designs to their unique space, contributing to a sustainable ethos through thoughtful design choices. Conclusion: Taking the Leap into DIY Installing RTA cabinets, while seemingly daunting, can lead to a rewarding experience for homeowners willing to embrace the challenge. This DIY approach not only fosters a sense of accomplishment but also supports sustainable building practices by ensuring a thoughtful connection between design and functionality. By educating oneself about this process, homeowners elevate their skillsets while enhancing the beauty of their living spaces. If you're ready to transform your kitchen while prioritizing sustainability, the time to start is now!

05.12.2026

Discover How to Install a Drip Irrigation System Efficiently

Update Unlocking the Secrets of Drip Irrigation: A Game-Changer for Your GardenFor any gardening enthusiast, efficient irrigation can transform your gardening experience. If you’ve been contemplating whether to invest in a drip irrigation system, now is the time! This innovative solution not only saves water but also ensures your plants receive just the right amount they need. With a price tag around $75 and a set-up time of just a few hours, it’s an accessible project that can yield remarkable results.Why Choose Drip Irrigation?Drip irrigation is described as a clever and simple solution for watering your plants directly at the root zone, minimizing evaporation and runoff—a huge advantage over traditional sprinklers. Studies suggest that drip systems can use up to 50% less water, which is a win-win for both the environment and your wallet.Step-by-Step Installation ProcessInstalling a drip irrigation system is akin to assembling a puzzle: you simply connect the dots with hoses and emitters to create an efficient watering network. Here’s a quick overview of the key steps:Planning and Designing: Identify the garden layout and group plants by their watering needs. You might want to create a checklist just like the one suggested by the experts at Sprinkler School.Gather the Materials: Purchase a good quality drip irrigation kit. Check out stores like Home Depot or Sprinkler Warehouse for a variety of options.Connect to the Water Source: Use a backflow preventer and timer. This way, you will ensure that your water supply stays untainted while enjoying automated watering.Distribute the Water: Lay out and secure your tubing, ensuring that everything is connected properly to provide equal access to water for all your plants.Potential Challenges and SolutionsLike any DIY project, installing a drip irrigation system can come with its challenges. From ensuring the proper pressure to avoiding clogs in emitters, it's important to troubleshoot issues as they arise. Regularly flushing the system every four to six months is a recommended practice by gardening experts to prevent clogging and ensure optimal performance.Conclusion: Start Your Eco-Friendly Journey TodayInstalling a drip irrigation system is more than just a home improvement task; it's a commitment to sustainability and efficiency in gardening. As you reflect on reshaping your watering strategy, take the plunge and install a drip system. Your plants (and the planet) will thank you for it!Ready to make your garden thrive with sustainable watering? Get your drip irrigation supplies today and start creating a water-efficient garden!

Terms of Service

Privacy Policy

Core Modal Title

Sorry, no results found

You Might Find These Articles Interesting

T
Please Check Your Email
We Will Be Following Up Shortly
*
*
*